“Edit your bitmaps by clicking” + “\n” +
“on the dots.” + “\n” + “\n” +
“The last dot can be dimmed” + “\n” +
“by the dimm slider.” + “\n” + “\n” +
“Copy your bitmap code and” + “\n” +
“paste it into the Arduino” + “\n” +
“gamekit load image example.” + “\n” + “\n” +
“Keys:” + “\n” +
“Up = Dimm Up” + “\n” +
“Down = Dimm Down” + “\n” +
“Backspace = Clear All” + “\n” +
“Command + C = Copy” + “\n” +
“Command + V = Paste” + “\n” +
“Command + H = Help”

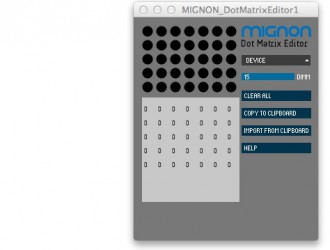
The MIGNON Dot Matrix Editor is a small handy tool that makes it easy to design bitmaps for the Mignon Game Kit.

  1. Edit your bitmaps by clicking on the dots.
  2. The last dot can be dimmed by the dimm slider.
  3. Copy your bitmap code and paste it into the Arduino gamekit “load image” example.

Keys:

  • Up = Dimm Up
  • Down = Dimm Down
  • Backspace = Clear All
  • Command + C = Copy
  • Command + V = Paste

Attention! The Mac Application is referred to as “damaged”, since it is not from a verified author. You need to set System Preferences / Security / App-downloads permit to “anywhere”.
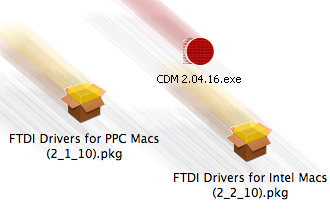
Look for the suitable MigProg driver (FTDI Virtual Serial Port) for your computer at: http://www.ftdichip.com/Drivers/VCP.htm and install it. For Windows it is advisable to use the „setup executable“ on the right hand side.


Install the Arduino software. You find the download on the Arduino homepage under „downloads“ (on the left top). Unzip the folder and move it to your folder “programmes”. Open the folder and move the logo to the dock respectively the quick launch bar. The last tested version is Arduino 1.0.5.


There are two versions of the library. One called „gamekit“ fort the old circuit board (version nr 2.0) and one called „gamekit_2_1“ fort he new 2.1 board. You can find the version number at the backside of the board.

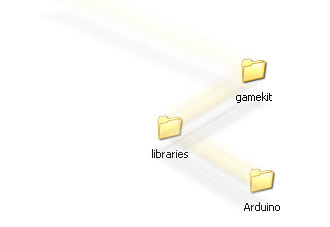
Download the Game Kit Library. The file is called “libraries.zip.” Start you Arduino software an quit it again. In doing so a Arduino folder is automatically generated in you documents folder. Now unzip the “libraries.zip” file and move the “libraries”-folder to the “Arduino” folder. In the process the Game Kit Examples are installed automatically.

Of course the first line of each code, which is embedding the library has to be adapted. Use #include <gamekit.h> or #include<gamekit_2_1.h>!


Serial Port
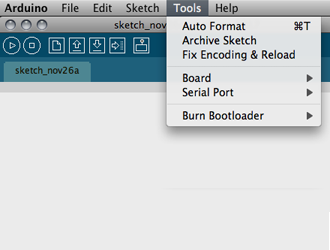
Start the Arduino software and open one of the examples. You find that in the file menu “Sketchbook“. Allocate the Serial Port to the the software. After correct installation of the FTDI driver the “usbserial” adapter should come first or last in the “Tools/Serial Port” list”. Select it so a checkmark appears (Under Windows you can check in the “Device Manager” which com-port number has been assigned to the USB-to serial driver.)

Borad
The Mignon Game Kit is compatible to the Arduino borad: “Arduino Duemilanove w/ ATmega328“.

For oder Game Kit Boards pleas have a look at the pint on your microcontroller. Is it a ATMEGA168 or ATMEGA328 ? Choose the right board at “Tools/Board” for example “Arduino Duemilanove w/ ATmega168”


The command „Upload to I/O Board“ in the file menu (control + U) installs the example on the game kit. In the process the memory is overwritten and thus the previous file deleted. The LEDs of the MigProg and the speaker of the game kit convey the programming process. The system should not be interrupted during programming, as the microcontroller may turn into a state where it is not programmable any-more otherwise.


Pleas download the PDF. A online version is coming soon.


void Begin();

Installs and starts the Gamekit library.

void set_pixel(row, column, value);

Places a “pixel” (illuminated LED) on the display in row 0 to 4 and column 0 to 6.

The last value is assigning a brightness from 0 to 15 to this dot. Higher values causes the dot to blink in different ways.


© olaf val, 2024